
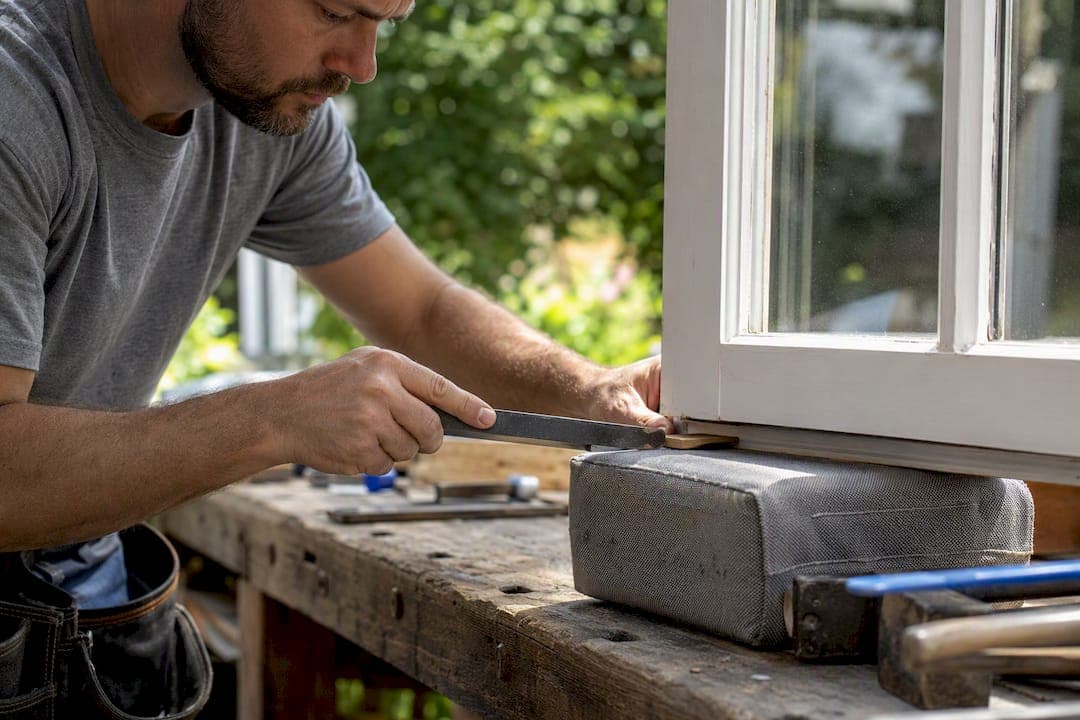
Toe and heeling braces a sealed unit diagonally, so a side hung sash or glazed door stays square and stops dropping. It works by inserting packers at opposite corners of the frame, transferring the glass unit's weight onto the hinge side and pulling the lock side back into alignment.
You need it on side hung casements, fully glazed doors, French and patio doors, and any large sealed unit that has started to sag under its own weight. The first thing to check on site is simple:
- Measure the diagonals across the sash. A mismatch beyond a very small tolerance means it's out of square.
- Decide whether the sash needs jacking back to square before you toe and heel it, or whether packers alone will do the job.
Key Takeaways
Toe and heeling corrects a dropped sash or door by bracing the sealed unit diagonally, restoring square alignment and lock engagement without full replacement.
| Point | Details |
|---|---|
| Check diagonals first | A mismatch of a few millimetres confirms the sash is out of square before you fit any packers. |
| Toe at hinge, heel at lock | Packers transfer glass weight to the hinge side and pull the lock side back into position. |
| Add packers past 800mm | Wide units need a centre packer to stop sagging between the two corner points. |
| Fix and test before beading | Seal packers with silicone and test the lock several times before refitting beads. |
| Stock the right sizes | Windowhardwarestore's packer, wedge gasket, and bridge packer ranges cover the sizes trade jobs need most. |
Table of Contents
- What toe and heel windows actually means on site
- Tools and packers to pack before you leave the van
- How to toe and heel a window or door step by step
- Diagnosing common faults before you reach for a packer
- Staying safe when handling sealed units
- Choosing the right packers, wedges and bridge packers for the job
- Where to get trade packers, wedges and gaskets fast
- Frequently asked questions
- Sources
What toe and heel windows actually means on site
Toe and heeling is the practice of inserting plastic packers diagonally into a sealed unit, one at the "toe" corner and one at the opposite "heel" corner, to brace the glass and stop it shifting inside the frame. The technique transfers the weight of the glass onto the hinge side rather than letting it hang off the lock keeps and gearbox.
Get the packer positions right and the sash stops sagging, the lock re-engages cleanly, and rattling glass settles down. Get it wrong, or skip it altogether, and you're looking at a familiar list of callbacks:
- Sash drop, where the bottom corner catches on the frame before it closes.
- Binding along one edge of the sash.
- Rattling or visible movement in the glass.
- Locks that won't engage, or engage but feel stiff.
Tools and packers to pack before you leave the van
A wasted return trip costs more than the extra ten minutes it takes to check your kit bag. Before you head out, you'll want:
- A glazing shovel or paddle for lifting beads without cracking them.
- Plastic glazing packers in a range of thicknesses, typically 1mm to 5mm.
- Wedge packers for fine, incremental adjustment where a flat packer won't sit properly.
- A spirit level and tape measure for checking diagonals and squareness.
- Suction cups or a glass lifter for handling large sealed units safely.
- Silicone or mastic to fix packers permanently once you're happy with the fit.
- Beading tools, plus gloves and safety glasses.
Carry bridge packers too. They span drainage slots without blocking them, which matters more than most fitters expect once water starts pooling in a channel that should have stayed clear. Window Hardware Store stocks trade packer ranges and wedge gaskets alongside the gearboxes and locking hardware you'll likely need on the same job, so one order can cover both.
How to toe and heel a window or door step by step
Before you touch a bead, confirm the fault is actually a squaring problem. Check the diagonal measurements corner to corner. If locks won't engage smoothly or the sash rubs at the bottom, it has almost certainly dropped. Check the setting blocks are still correctly positioned and confirm drainage slots are clear before you start.
- Support the sealed unit. Use suction cups to take the weight of the glass off the frame while you work.
- Remove the beading carefully. Start at the centre of the longest bead and work outward with the glazing shovel, never forcing a corner.
- Rest the unit on setting blocks. This is your reference point for every measurement that follows.
- Raise or lower the sash as needed. If the lock side has dropped, the unit needs lifting at that corner before packers go in.
- Insert packers at the hinge side corner (the toe). This transfers weight away from the lock side and gearbox.
- Insert packers at the opposite lock side corner (the heel). Lever gently to create enough of a gap to slide the packer home without forcing it.
- Add extra packers where spans exceed 800mm. A centre packer stops a wide unit sagging between the two corner points.
- Use bridge packers at the bottom edge. These keep drainage channels open while still supporting the glass.
- Test the sash or door before you fix anything. Open, close, and lock it several times. If it still catches, adjust the packer thickness rather than forcing the mechanism.
- Fix the packers with silicone once you're satisfied. This stops them migrating over time as the unit settles.
- Refit the beading, starting with the longest side again and working the corners last.
The Exeter Trade Aluminium guide sets out this same sequence with diagrams for bi-fold and single door applications, worth keeping on your phone for reference on trickier jobs.
Pro Tip: On a stubborn sash, use a wide flat bar as a fulcrum against a padded block, never against bare uPVC or the frame itself. Lever just far enough to slide the packer in, then stop. If you need more than gentle pressure, the sash is probably still out of square and needs jacking properly rather than forcing.
Toe and heeling is widely used by glazing specialists precisely because it restores operation quickly and cheaply compared with replacing a whole door or sealed unit, provided the frame itself isn't damaged.
Diagnosing common faults before you reach for a packer
Not every sticking sash is a toe and heel job, so a quick diagnostic saves you fitting packers that won't fix anything.
- Sash catches at the bottom: usually means the lock side has dropped. Check diagonals first.
- Sash catches at the top: often points to a hinge issue rather than a packer problem. Toe and heeling won't fix worn hinges.
- Lock won't align: temporarily insert a packer at the lock side corner to test whether alignment improves before committing to a full repair.
- Glass rattles or shifts in the frame: check for missing or displaced packers rather than assuming the gasket has failed.
- Wide units (over 800mm) sagging in the middle: add a centre packer rather than over-packing the corners.
If none of these quick fixes solve it, the frame may be racked or the sealed unit itself may need replacing. Verify lock engagement using the locking catch mechanism itself, since a worn gearbox can mimic the symptoms of a dropped sash.
Staying safe when handling sealed units
Sealed units are heavier and more fragile than they look, and a rushed lift is where most site injuries happen.
- Wear gloves and safety glasses whenever you're removing beads or handling glass edges.
- Use suction cups on anything larger than a standard casement, and get a second pair of hands for full-height patio or French door units.
- Never lever aggressively against the frame. Excess force cracks beading and can chip the sealed unit's edge seal.
- Leave setting blocks and drainage paths exactly as you found them. Blocking a drainage slot with a misplaced packer causes water ingress that shows up weeks later, not on the day you fit it.
Choosing the right packers, wedges and bridge packers for the job
Not all packers are equal, and the wrong profile causes as many callbacks as skipping the job altogether. For general corner support, durable plastic glazing packers in a range from 1mm to 5mm cover most jobs. For fine adjustment where a flat packer is too coarse, a wedge packer with a TW profile lets you dial in the exact clearance without stacking multiple flat packers, which compress unevenly over time.
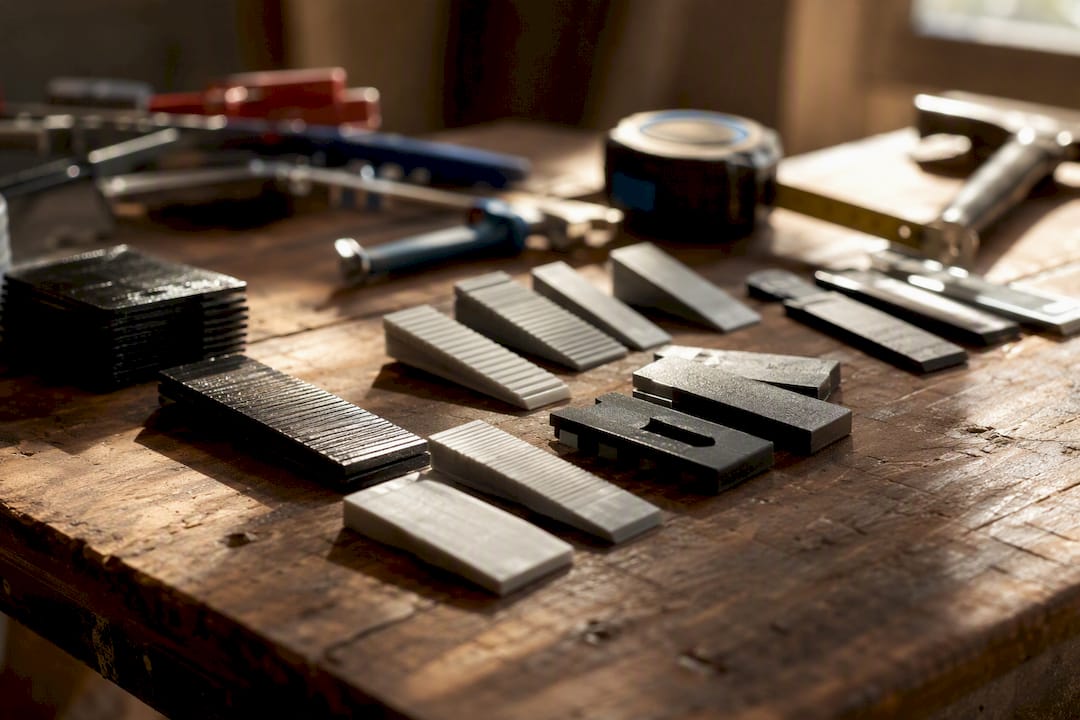
Bridge packers earn their place at the bottom of the unit, where their raised profile keeps drainage channels clear while still bearing load. Material matters here too: cheap packers compress permanently under sustained weight, which is exactly how a "fixed" sash starts dropping again within a year.
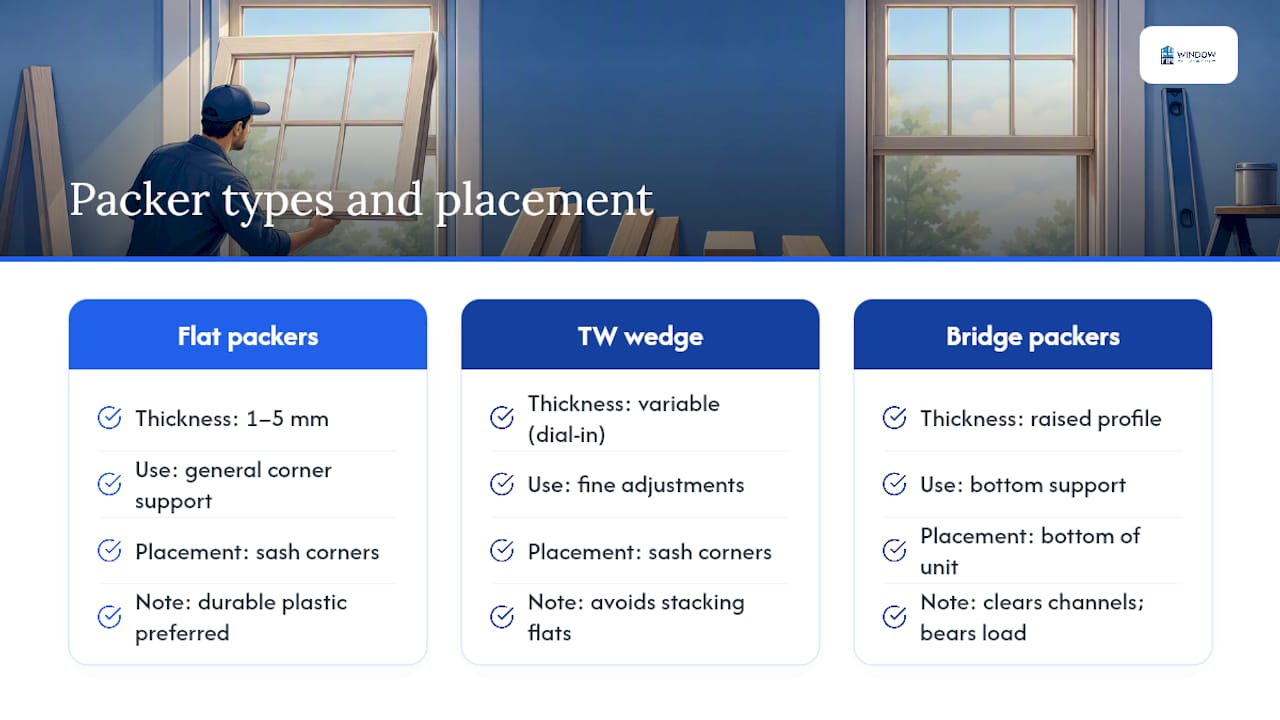
Carry a small trade kit covering the common thicknesses rather than buying single sizes as you need them. Window Hardware Store's wedge gasket and packer ranges cover the sizes you'll use most often, alongside E-type gaskets for sealing once the packers are fixed.
An installer's reminder
Always recheck the diagonals after you've fitted the packers, not just before. Seal every packer with silicone, test the lock three or four times, and note the packer positions and sizes on the job sheet before you refit the beads.
Where to get trade packers, wedges and gaskets fast
Running short on wedge packers or gasket mid job is one of the most frustrating ways to lose an afternoon. Windowhardwarestore is built around exactly that problem: real-time stock visibility means you can check what's actually on the shelf before you order, not after you've already driven to a job with the wrong size in the van.

You'll find durable plastic glazing packers across the common thickness range, the TW023 wedge gasket for fine adjustment work, and bridge packers suited to drainage zones, all available with trade pricing that's open to every customer, not just account holders. Fast nationwide delivery means a missing size doesn't have to stall a job for days. If you're sealing after packer work, the E015 gasket range covers most standard profiles. Browse the full hardware range and get your next kit ordered before your next site visit.
Frequently asked questions
What does toe and heeling a window actually fix? It corrects sash drop and lock misalignment caused by a sealed unit shifting or sagging inside the frame, restoring square alignment without replacing the unit.
Do all windows need toe and heeling? No. It's typically required on side hung casements, fully glazed doors, French and patio doors, and other units carrying heavier sealed glass, where the frame relies on packers to distribute weight correctly.
How do I know if a sash needs toe and heeling or a hinge adjustment? Check where the sash catches. Binding at the bottom usually points to a dropped sash needing packers, while catching at the top more often indicates a worn or misaligned hinge.
What packer thickness should I start with? Start in the 1mm to 3mm range and test the lock and operation before adding more. Overpacking one corner can push the sash out of square in the opposite direction.
Can I toe and heel a uPVC door myself? Competent DIYers can manage smaller jobs with the right tools and packers, but full glazed doors and large sealed units are heavy and benefit from a second pair of hands and proper suction cups.
Sources
- Toe and Heeling Guide for Trade Installers | Alex Trade Frames
- How Toe and Heeling Fixes Windows | RPS Double Glazing Repairs
- How to Toe and Heeling Correctly | Kensington Windows & Doors
- Exeter Trade Aluminium Toe and Heeling Glazing Guide (page 1 of 3)
- Toeing & Heeling - THE WINDOW MAN
Recommended
- Sash Window Lock Problems: Why Your Lock Won't Hold | Window Hardware Store | Window Hardware Store
- Best Offset Window Handles for Low Sill Positions | Window Hardware Store | Window Hardware Store
- Heritage Sash Window Locks: Period-Appropriate Options | Window Hardware Store | Window Hardware Store
- Espag Window Handles: Trade Tips for Fast Replacement | Window Hardware Store | Window Hardware Store